Saturday, August 3, 2013

ALVA Baby large size cloth diaper review


We don't use diapers during the day any more(YAY!),only at night.I used disposables before and I wanted to use cloth until Lea is fully potty trained.She is 28 months,more than 15kg and 95cm,but she looks bigger than her friends at that age.
I haven't been using those fancy,expensive cloth diapers,because I couldn't afford them.That's why I bought this diaper.The manufacturer says it will fit babies from 12 months up to 3 years.I was a little bit sceptical,but decided to try it anyway.It fits her perfectly.

The material is nice and soft,the diaper was pretty cheap(7$ for diaper and 4-layer microfiber insert),but it doesn't look cheap at all.It has 4 rise setting,it's easy to change the size.It has cross over snaps and hip snaps,so You won't have "wing droop" problem.
This diaper is pretty long(55cm when You stretch it),so I think it's a great choice for tall toddlers.Only thing I didn't like are the wings(Lea is on the smallest waist setting).I think they are too long,and because of that diaper wouldn't fit 1 year old baby(waist would be too big).So I aded few snaps on the left wing,if I have another baby :P and that way I could use it longer.
I made a video,so You can see what does the diaper look like.I hope my voice is not too annoying.
You can choose different prints of Alva Baby large size diapers. 
You can buy Your diaper HERE.

Watch my Youtube video


Monday, July 8, 2013

Blog update

I've been MIA lately.My life has been so crazy.I am enjoying with my kid and I don't remember when was the last time I made something.Also,I am trying to lose some weight and potty train my little girl.I will have my own sewing room,but I haven't bought a sewing machine yet.So I will probably crochet for the next few days.

Monday, June 17, 2013

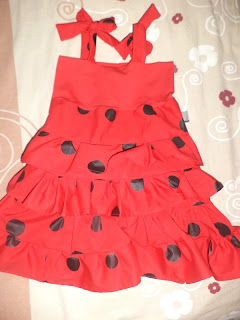
Sewing clothes

I promised few tutorials for this month,but i had so many orders recently,i can't find enought time for my blog.And i broke my digital camera.My sewing machine is also not working properly,so i finally decided to buy a new one,next week.I can't wait to try it.
I'll show you only few things i made.


Saturday, May 25, 2013

Blog update

Ok,now I see I posted 11 days ago.I spent almost every day at hospital,I wasn't feeling good,but now I finaly know what's wrong and I am so happy I can solve the problem.I have Vertigo,and last 2 weeks I tried to stay in bed,because I was unable to do anything.But I had to.I had some orders(that's why I am not posting on my blog so often),and I was finishing them.
I was preparing some tutorials and patterns(You'll see them next month).
So,I made Hello Kitty sleeping bag.
And few big flower headbands.

And,yes,it took almost 10 days to finish it :)

Tuesday, May 14, 2013

Baby bow shorts

Last 3-4 days i wasn't feeling well.I have nausea,i feel dizzy all the time.I just know something's wrong.So i'll go to the doctor today to find out what's happening.
I was trying to make this shorts for 3 days,it was hard beacuse it seems like everything is twisting and moving around me,so i couldn't sit on a chair for a long time.
But i did it.Here's the result.
I didn't tie bow on this picture,but believe me,it's too cute.

Sunday, May 12, 2013

Maternity shorts tutorial and pattern


This is my first free pattern.I was bussy lately,sewing things for others.One girl asked me to make maternity shorts,so i made a pattern and i want to share it with you.Size of this shorts is M/L.
First,let me show you some beautifull fabrics my hubby bought.
I used this polka dot fabric to RECOVER UMBRELLA STROLLER.
I used navy linen and beige linen for maternity shorts(knit matching fabric also).

Print pattern HERE.I am so sorry i couldn't do better than this,i dont't have scaner yet and i don't have any pattern making program :P.
I didn't make pattern for belly band,but it's very easy and you could do it by yourself.
So,you need to cut 2 pieces for front and 2 pieces for back(pattern piece with straight belly band part)
Place 2 front pieces right sides together and sew like this:


Then the other two parts:
Then place those 2 sewn pieces(front and back) right sides together
and sew on the sides and between legs.

Now make belly band,panel or however it's called.
Front
and back.
Those pieces are folded.Unfold them and then sew on sides(right sides together).
Cut 1 piece of elastic,then sew or tie knot.Place it inside of the panel.

Turn shorts right side out and place panel around(or you can leave right sides inside and place folded panel inside,then sew around).
and now the leg hem.
 And you're done...

Linking to:
It's Party time


It's Overflowing

Too Much Time On My Hands
sew many ways

Friday, May 10, 2013

Stroller recover tutorial

Like i promised,i'll show you how to recover your old and ugly umbrella stroller.
It was sooo easy,so i am not sure if i took photos of every step.
You can see in THIS post how i took off stroller fabric.

Here is the seating part.
I removed buckle strap.
Then i started ripping seams(i removed sides and stroller bar cover fabric)
This is how i made patterns.I traced every part,adding 1cm or 1,5cm seam allowance.


Then,sewing.I put this old seating part into new "cover" so it's nice and soft.


If you do the same,leave one side open,and when you put seat pad inside,pin opening and top stitch.
I removed canopy later,and i'll try to recover it these days.I'll put a bow on the top so stroller will definitely look like Minnie Mouse.
Ok,then i made sides,little "pocket" that hold stroller liner in place and put buckle strap back on the stroller.


This project took me about 2 hours.
It was easy and i hope i helped you a little bit to recover your umbrella stroller.


Linking to:
Fabulously creative Friday linky party
Inspiration gallery link party
Crafty Thursday Obsessions
Your great idea linky party
Strut your stuff link party
One Artsy Mama
craftionary


Thirty Handmade Days
All Things with Purpose
Daisy Cottage Designs
Lil\'Luna
Too Much Time On My Hands
It's Overflowing
Serenity you
Blogging tips